How to do Polygel Nails at Home: A Beginner’s Guide

Published February 24, 2022
Maintaining a manicure can be challenging — if one of your nail chips, the entire set is damaged. Then, another issue arises of whether you are permanently damaging your nails or not by using treatments like acrylics or gels.
If you’re thrilled with the look of the acrylic, gel, or dip powder manicures but don’t want to risk hurting your nails, meet polygel, your new manicure savior. This gel-acrylic hybrid can eliminate the need for you to pick between nail style and safety.
Polygel Nails Who?
Polygel is a gel-acrylic hybrid composition for nail enhancement. You get the flexibility of a gel with the strength of acrylic. Polygel has the consistency and texture of gel but is slightly thicker. When placed properly, polygel nails are extremely durable. They are sturdy and flexible, despite their lightness compared to other solutions such as hard gels.
Is it Better Compared to Acrylic Nails?
Like acrylic, polygel may be used to fill in, sculpt or extend nails. However, there are some distinctions; it is considerably lighter and just as durable as acrylic.
Polygel nail ideas are perfect for softer nails but are not advised for those who have more brittle nails. It’s an excellent balance for those who have healthy natural nails but wish to have a bit more stability and strength without the acrylics’ abrasiveness.

How to do Polygel Nails
Before asking how to do polygel nails at home, you’ll need the following supplies. Without the proper tools, attempting the process can be difficult and damaging to the nails. The things you’ll need are:
- Polygel nail kit
- Base and topcoat
- Dual or nail forms
- Alcohol, and
- LED light
The steps on how to use polygel nails may vary according to the instructions included with your polygel kit; follow them precisely for the best results. You may also watch polygel nail tutorial on YouTube to see it firsthand.
- File your nails to help smooth out any rough edges, ensuring that you begin with a smooth surface.
- Pick the dual or nail forms most suited for your fingers. This step is optional, as the polygel can be applied directly to natural nails.
- Apply the base coat and allow it to cure using the LED light.
- Dip your brush in the slip/alcohol-based solution included.
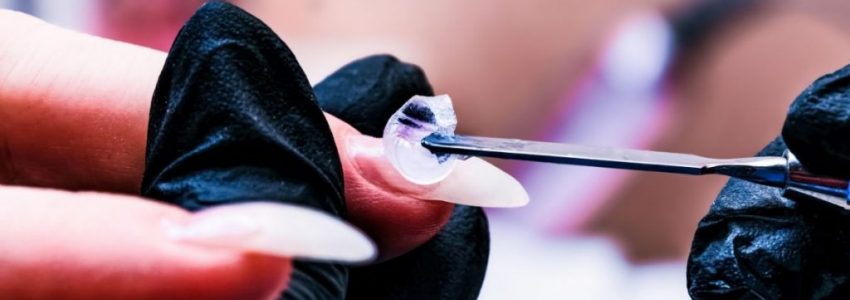
- Apply the polygel directly onto the form of the nail. Spread the polygel evenly on the dual form and use your brush to form it into the desired shape.
- Under the LED light, cure your nails to set the polygel. If you’re using a dual form, push the polygel-coated dual form against your nail before curing it.
- Cut, file, and shape your nails to achieve the style you want; if you’re using a dual form, remove it before you begin.
- For the last step, apply the topcoat and cure it under the LED light.
Takeaway
The polish itself lasts approximately three weeks, depending on your lifestyle. If you choose not to use a less expensive polygel kit at home, keep in mind that in-salon rates might range from $75 to $150. If you just have fillers for your nails rather than a set of polygel nails, prices will definitely be lower.
(Related: How to Safely Remove SNS Nails at Home?)
Lease Salon Space In Royal Palm Beach Florida
Fulfill your dreams and be your own boss when you lease salon space in Palm Beach Florida with us. Our beautiful salon spaces come with complimentary laundry and cleaning services and a flexible lease agreement you can afford. Our salon suites come with many amenities including free cleaning service, televisions, storage space, and more. Contact us now to book a tour or learn more.

Fact Checked By Experts
Our team of internal experts diligently fact-checked this content to ensure accuracy and reliability. Find detailed information about the rigorous editorial standards we uphold for our website.

About The Author
Krizzia Paolyn is a professional blogger whose work has reached millions of people worldwide. She has a bachelors degree in Psychology and a passion for beauty trends.


