Filing Nails Like a Pro: Techniques, Tools & Tips
Published October 13, 2026
A smooth nail edge and balanced shape can make a manicure look polished, even without polish. Using the right nail-filing technique helps achieve that finish while reducing damage. The wrong file, excessive pressure, or aggressive sawing can leave natural nails rough or uneven.
Whether you prefer short, rounded nails or a defined almond shape, choosing the right file and using controlled strokes makes nail care easier. Here’s how to choose a nail file, shape your nails, and avoid common mistakes.
What Nail File Should You Use?
The right nail file depends on your nail type, desired shape and whether you are working with natural nails or artificial enhancements. For everyday nail care, choose a file suitable for shaping the free edge without removing too much material.
Types of Nail Files and Their Uses
Different nail files offer different benefits:
- Emery boards: Affordable and convenient for everyday shaping and smoothing rough edges.
- Glass nail files: Have a fine abrasive surface that can help smooth the free edge when used gently. Follow the manufacturer’s cleaning and care instructions.
- Metal nail files: Durable, but their abrasive surfaces vary. Choose one specifically suitable for natural nails and use gentle pressure.
- Professional nail files: Available in different grits for tasks ranging from natural nail shaping to refining gel or acrylic enhancements.
For home manicures, a fine emery board or glass file is a practical choice. Avoid using coarse files designed for artificial nail products on your natural nail plate.
How to Choose the Right Nail File Grit
Grit indicates how coarse or fine a nail file’s abrasive surface is. Lower numbers generally mean coarser abrasives, while higher numbers indicate finer surfaces.
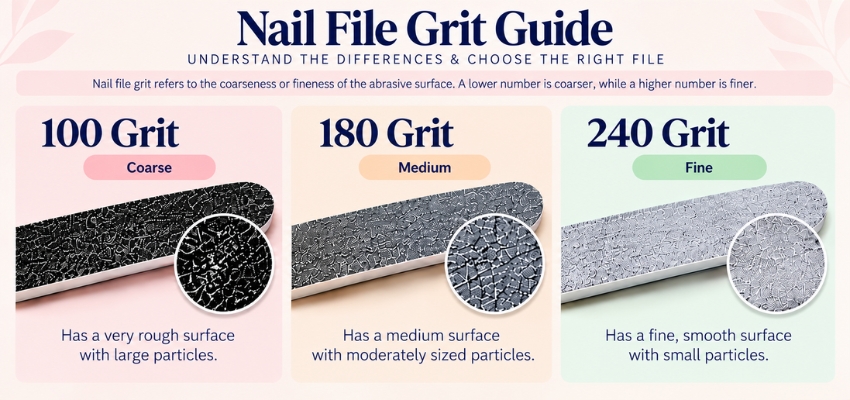
A 240-grit file is suitable for shaping the free edge of natural nails. For professional gel application, a 150-grit file or buffer may be used to gently prepare the natural nail plate with little to no pressure. This step is intended to lightly prepare the surface for product adhesion, not to thin the nail.
Coarser files, such as 100- or 120-grit options, are used to remove bulk from artificial nail enhancements. They should not be used directly on the natural nail plate.
Always follow the file manufacturer’s instructions and choose the appropriate grit for the task. For routine nail care, focus on shaping the free edge without unnecessarily thinning or damaging the natural nail.
How to File Nails Correctly Step by Step
A neat finish comes from controlled movements and checking your progress as you work. You do not need to remove much length or apply heavy pressure to achieve a clean shape.
Prepare Your Nails Before Filing
Start with clean, dry hands and nails. Remove nail polish if you want a clearer view of the natural nail edge, then check for snags, peeling or cracks.
If your nails are long, use nail clippers to remove some length before filing. Trim conservatively, leaving enough length to create your preferred shape without cutting too close to the fingertip.
Work in a well-lit area. If a nail is deeply cracked, painful or damaged near the nail bed, avoid filing into the affected area.
Hold the Nail File at the Right Angle
Hold the file comfortably and support your finger to keep your hand steady. Position the abrasive surface against the free edge rather than scraping across the top of the nail plate.
Adjust the file’s position to suit the nail’s length and your chosen shape. A stable grip helps you control the edge without accidentally filing the surrounding skin.
File Your Nails Using Gentle, Controlled Strokes
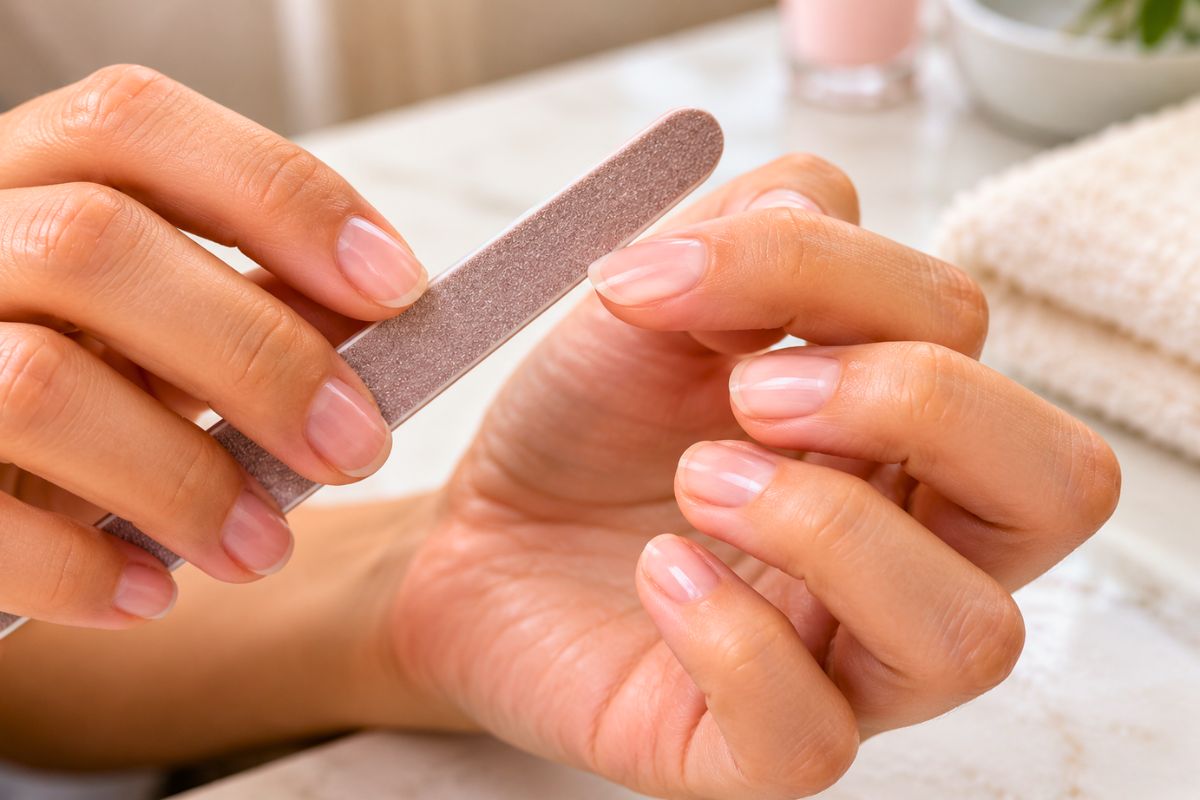
Start at one side of the nail and move toward the center with a smooth stroke. Repeat from the opposite side, checking the shape as you go.
Smooth rough or uneven edges with a nail file or emery board. Always file in the same direction, as filing back and forth can weaken your nails, according to the American Academy of Dermatology (AAD).
Work slowly, particularly when shaping short nails. A few light strokes may be enough to smooth a snag or refine the outline. Pause to inspect the nail before removing more length.
Refine the Shape and Smooth the Edges
Once you reach your desired length and shape, examine the nail from above and the side. Check whether the free edge looks balanced and whether either side needs further refinement.
Use a few gentle strokes to smooth rough areas. Natural nail beds vary, so aim for a balanced appearance rather than identical outlines across every finger. Excessive filing can weaken the nail without improving its shape.
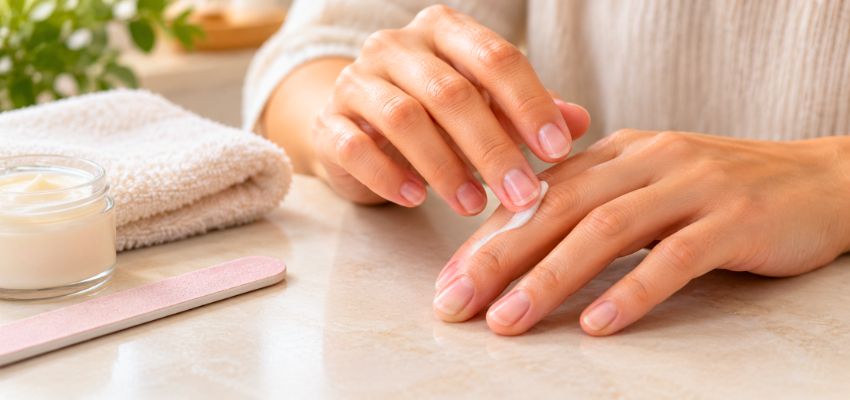
Brush away filing dust and finish by applying hand cream or cuticle oil to the nails and surrounding skin.
How to File Nails into Different Shapes
Your chosen shape affects the appearance of your manicure and how easily your nails snag on clothing or other surfaces. Work gradually, removing only the material needed to create the desired outline.
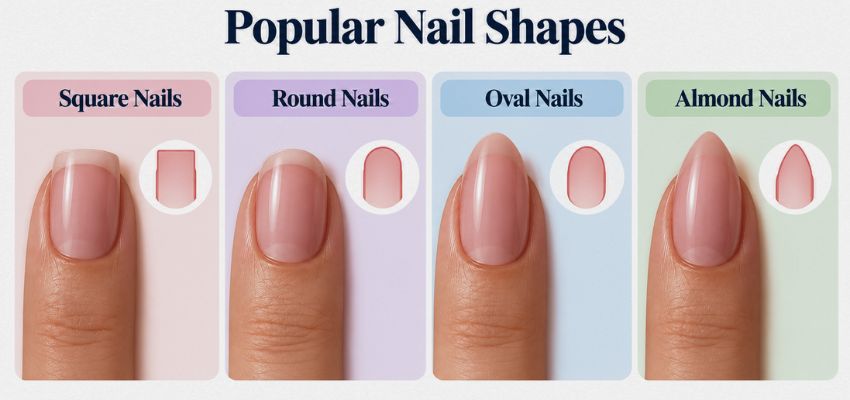
How to File Square Nails
Square nails have straight sides, a flat tip and defined corners. They suit a clean, structured look.
File the free edge straight across, keeping the file perpendicular to the centerline of the nail. Use controlled strokes to maintain an even tip, and avoid filing deeply into the sidewalls.
How to File Round and Oval Nails
Round nails have a gently curved tip and work well at shorter lengths. Oval nails have a more elongated curve that follows the natural outline of the nail.
For a round shape, file the sides toward the center and soften the corners into a smooth curve. For an oval shape, taper the sides slightly and round the free edge gradually. Check both sides to maintain balance.
How to File Squoval Nails
Squoval nails combine a square tip with softened corners. This shape offers definition without sharp edges.
File the tip straight across, then use light strokes to soften each corner. Check from above to ensure the tip remains mostly flat and both corners have a similar curve.
How to File Almond Nails
Almond nails taper toward a rounded point, creating an elongated appearance. They require enough nail length to shape safely.
File each side at a gradual angle toward the center of the free edge, alternating sides to maintain balance. Soften the tip rather than creating a sharp point, and avoid filing deeply into the sidewalls.
Common Nail Filing Mistakes to Avoid
Small adjustments to your technique can help you achieve a neater shape while reducing unnecessary stress on natural nails.
Filing Back and Forth Too Aggressively
Aggressive back-and-forth filing can weaken nails. Use controlled strokes in one direction at a time, working from one side toward the center before repeating from the opposite side.
Using a Nail File That Is Too Coarse
Coarse files remove material quickly and can damage natural nails. Choose a file specifically intended for natural nail shaping, and reserve coarser abrasives for appropriate artificial nail products. Do not use a coarse file to thin the natural nail plate.
Filing Too Much or Applying Excessive Pressure
Repeatedly filing the same area can weaken the free edge and leave nails shorter than intended. Apply light pressure, check your progress and stop when the desired shape is achieved.
Over-Filing the Sides and Corners
Filing too deeply into the sides can compromise the nail’s shape and increase its vulnerability to damage. Keep the sidewalls intact and focus on the free edge. If a corner snags, smooth that area instead of reshaping the entire nail.
How to File Brittle or Peeling Nails Safely
If your nails are brittle, peeling or prone to splitting, use a gentle approach. Choose a file suitable for natural nails, apply minimal pressure and remove only enough length to smooth the edge. Shorter, rounded shapes may help reduce snagging.
Moisturize your nails and surrounding skin regularly with hand cream or cuticle oil. Frequent water exposure can contribute to nail damage, so wear protective gloves when washing dishes or using cleaning products. The American Academy of Dermatology’s nail care guidance provides additional tips.
Pay attention to changes in your nails, including persistent splitting, unusual discoloration, changes in texture, or changes in shape. These may sometimes indicate an underlying health issue. If you notice unusual changes or have concerns about your nail health, consult a healthcare professional. Learn more about nail health from the Cleveland Clinic.
Frequently Asked Questions
What is the correct way to file your nails?
Use a suitable file on clean, dry nails. Shape the free edge with gentle, controlled strokes, checking the outline as you work. Stop once the desired shape is achieved.
Should you file nails in one direction or back and forth?
For natural nails, file in one direction at a time rather than using aggressive sawing movements. Work from one side toward the center, then repeat from the opposite side.
What nail file grit is best for natural nails?
For routine shaping, a 240-grit file is suitable for refining the free edge of natural nails. The appropriate grit depends on the task, so follow the manufacturer’s instructions. For professional gel preparation, a different grit may be used by a trained nail technician.
Is it better to file nails wet or dry?
For routine shaping, clean, dry nails are practical because the free edge is easier to assess. Allow your nails to dry thoroughly after washing before filing.
How often should you file your nails?
File as needed when your nails grow beyond your preferred length, develop rough edges or begin snagging. There is no fixed schedule. If your nails already have the shape you want, additional filing is unnecessary.
Does filing your nails make them stronger?
Filing does not make the nail plate inherently stronger. It helps maintain the shape and smooth rough edges, which may reduce snagging. Gentle filing, moisturizing, and avoiding repeated damage help maintain healthy-looking nails.
Final Tips for Filing Nails Like a Pro
Good nail filing comes down to choosing a suitable file, using controlled strokes and stopping before you remove too much material. Gradual shaping helps you achieve a balanced finish while reducing unnecessary stress on your natural nails.
If you want a more precise finish or need help choosing a suitable shape, consider visiting a professional nail technician. Explore Salon Suites of Wellington to learn more about its beauty services.
Lease Salon Space In Royal Palm Beach Florida
Fulfill your dreams and be your own boss when you lease salon space in Palm Beach Florida with us. Our beautiful salon spaces come with complimentary laundry and cleaning services and a flexible lease agreement you can afford. Our salon suites come with many amenities including free cleaning service, televisions, storage space, and more. Contact us now to book a tour or learn more.

Fact Checked By Experts
Our team of internal experts diligently fact-checked this content to ensure accuracy and reliability. Find detailed information about the rigorous editorial standards we uphold for our website.

About The Author
Hi, I’m Corinne Grace, a nursing graduate from Riverside College and a passionate fan of the beauty industry. Through my professional background and experience, I write to help independent stylists and beauty entrepreneurs run healthier and more profitable businesses.